 Save
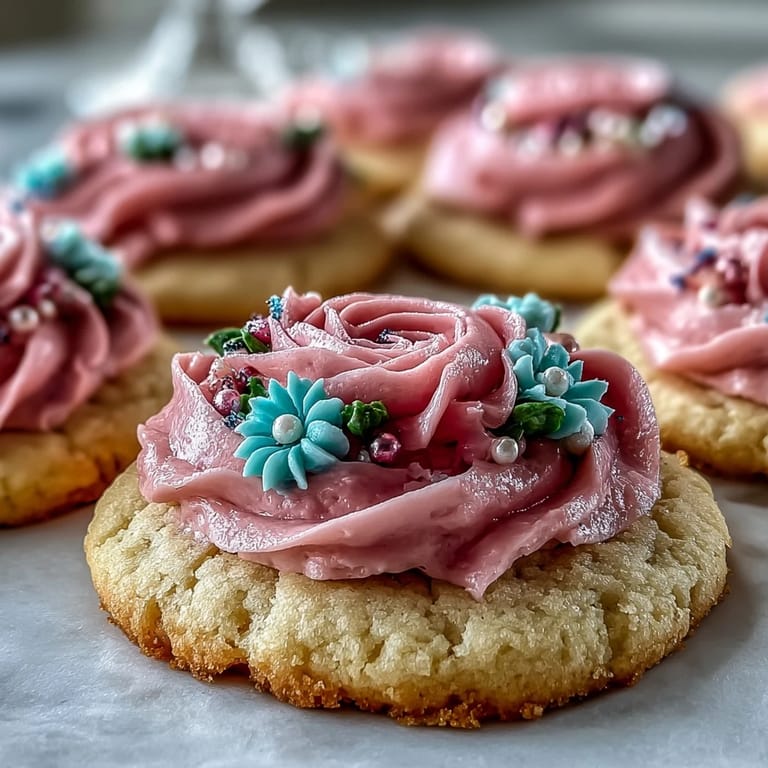
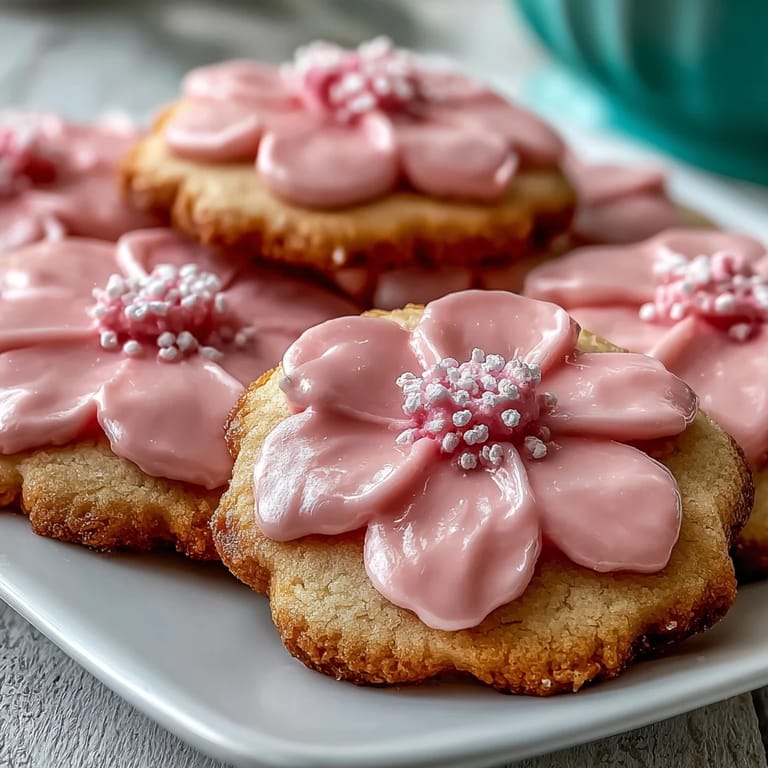
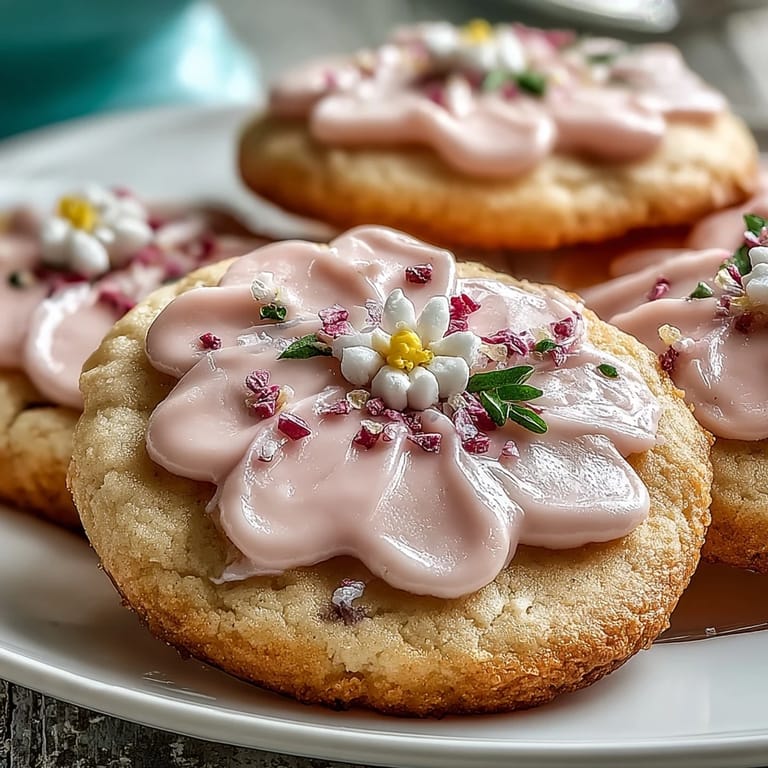
Save My sister called me three weeks before her baby shower in a minor panic—she needed something that looked like it belonged in a magazine spread but wouldn't stress her out completely. I remembered making delicate flower cookies years ago, watching them emerge from the oven like tiny edible gardens, and offered to create a batch for her celebration. What started as a favor became my own small obsession with getting those pastel icings just right, mixing them to the exact shade of a spring sky. The morning of the shower, arranging these buttery little blooms on tiered stands felt like creating something genuinely meaningful.
I watched my brother-in-law steal three cookies off the display before anyone else arrived, sneaking them because his wife had explicitly forbidden tasting them early. He came back two minutes later with powdered sugar on his nose, completely unapologetic, and said they reminded him of his grandmother's kitchen in spring. That moment—where a simple cookie transported him somewhere real—made all the careful icing work feel completely worthwhile.
Ingredients
- All-purpose flour (2 1/2 cups): This is your structural foundation, and measuring by weight if you can makes a real difference in consistency—too much flour creates tough cookies, too little and they spread like sugar puddles.
- Unsalted butter (3/4 cup, softened): The soul of these cookies lives here, so use good butter you'd actually eat on toast, and let it get genuinely soft before mixing so it creams properly with the sugar.
- Granulated sugar (3/4 cup): This sweetens the dough while helping create that tender crumb structure that makes the cookies melt on your tongue.
- Large egg: Binds everything together and contributes subtle richness that dry doughs completely lack.
- Pure vanilla extract (2 teaspoons): Don't skip the word pure here—it's the difference between tasting like actual vanilla and something synthetic that haunts the aftertaste.
- Baking powder (1/2 teaspoon): Provides just enough lift to keep these from being dense, but restraint is key since you want delicate cookies, not cake.
- Salt (1/4 teaspoon): A quiet amplifier that makes every other flavor pop without announcing itself.
- Powdered sugar (3 cups, sifted): The icing base that creates that smooth, glossy finish—sifting actually matters here to eliminate lumps that would show in your final decoration.
- Meringue powder (2 tablespoons): This transforms powdered sugar into proper royal icing that hardens and sets, creating that signature polished look.
- Water (4-5 tablespoons): Added gradually to achieve the right icing consistency—too thick and you're fighting it, too thin and it runs everywhere like a pastel flood.
- Pastel food coloring gels: Gel colors are your friend because they don't water down your icing like liquid food coloring does, and these soft shades feel genuinely spring-like rather than artificial.
Tired of Takeout? 🥡
Get 10 meals you can make faster than delivery arrives. Seriously.
One email. No spam. Unsubscribe anytime.
Instructions
- Prepare Your Dry Ingredients:
- Whisk together flour, baking powder, and salt in a medium bowl, then set it aside where you can easily access it when needed. This step ensures everything is evenly distributed before it meets the wet ingredients.
- Cream Butter and Sugar Into Clouds:
- Beat softened butter and sugar together for a full 2-3 minutes until the mixture becomes noticeably lighter in color and fluffy enough that you could practically float on it. This aeration is what eventually makes your cookies tender rather than dense, so don't rush this moment.
- Incorporate the Egg and Vanilla:
- Add the egg and vanilla extract to your fluffy butter mixture and beat until everything is completely combined and looks homogeneous. Stop occasionally and scrape down the bowl so nothing hides in the corners.
- Bring Together Wet and Dry:
- Add your dry ingredients to the wet mixture gradually, mixing just until you see no more flour streaks—overworking dough develops gluten and creates tough cookies. The moment everything comes together is the moment to stop.
- Chill the Dough:
- Divide dough into two discs, wrap them in plastic, and refrigerate for a full hour (or longer if your day allows). Cold dough doesn't spread into weird shapes and stays beautifully defined, which matters when you're creating delicate flowers.
- Ready the Oven and Workspace:
- Preheat your oven to 350°F and line two baking sheets with parchment paper. Having everything prepared before you start rolling dough prevents that frantic scramble where you're holding cold dough while searching for parchment.
- Roll and Cut With Purpose:
- On a lightly floured surface, roll out one dough disc to about 1/4-inch thickness—thick enough that your flowers don't become paper-thin and fragile, but thin enough that they bake evenly. Use your flower cutter to create shapes, then gather scraps, refrigerate them briefly, and re-roll for a second batch.
- Space and Bake:
- Place cookies about an inch apart on your prepared sheets and bake for 10-12 minutes until the edges are just barely golden—the centers will still look slightly underbaked, which is exactly right since they continue cooking on the hot sheet. This restraint is what keeps them tender instead of hard.
- Cool With Intention:
- Let cookies sit on the baking sheet for exactly 5 minutes so they firm up enough to move, then transfer them to a wire rack for complete cooling. Never ice warm cookies because the icing will melt into a sad puddle.
- Make Royal Icing Magic:
- Combine sifted powdered sugar and meringue powder, then add water one tablespoon at a time while mixing until you reach a consistency that's thick but still spreadable—it should fall from a spoon in ribbons. This is where patience rewrites everything.
- Divide and Color:
- Portion your icing into small bowls and tint each one with just a touch of pastel gel color, starting with less than you think you need since colors deepen as you mix. The goal is springtime pastels, not artificial neon.
- Decorate and Celebrate:
- Spread or pipe icing onto completely cooled cookies, creating whatever pattern your hands feel like making—stripes, dots, solid color, half-dipped, whatever feels right. Let icing set completely before stacking or packaging so everything stays pristine.
 Save
Save During the baby shower, a little girl asked if the flowers were real and if she could eat them, then looked genuinely amazed when she discovered they tasted like butter and sugar instead of petals. That simplicity—creating something beautiful that's also genuinely delicious—felt like the whole point of baking in the first place.
The Secret Behind Tender Cookies
Most cookie failures come from either overworking the dough or baking too long, and I learned this through trial and error involving my entire family's honest feedback. The key is treating your dough gently, respecting the chill time, and understanding that cookies continue cooking on the hot baking sheet even after you remove them from the oven. When edges are golden but centers still look slightly underbaked, you've found the sweet spot.
Playing With Flavor Variations
Once you master the basic recipe, there's room for personality—adding a tiny drop of almond extract transforms the flavor into something subtly more sophisticated, almost like a French patisserie decided to visit your kitchen. Lemon zest mixed into the dough creates a bright spring version, and honestly even a whisper of rose water can take these somewhere genuinely special if you're feeling adventurous.
Making These Celebrations Feel Personal
The beauty of cookies with decorative icing is that they reflect whoever's holding the piping bag, which means your version will look different from anyone else's and that's exactly the point. You can lean into precision with perfectly piped designs, or embrace imperfection with wonky flowers that somehow look more charming because they're real rather than Instagram-perfect. Whatever happens in that decorating phase becomes part of the story these cookies tell.
- Consider baking these a day ahead so decoration feels relaxed rather than rushed on the actual celebration day.
- Package them in clear boxes or bags with simple twine if you're gifting them, since they're beautiful enough to be their own presentation.
- These cookies hold up well for several days in an airtight container, so they're perfect for celebrations that require advance preparation.
 Save
Save These cookies exist at the intersection of simple and special, which is honestly the best place for any recipe to live. Make them for someone you love or for yourself on a day that needs a little beauty.
Recipe FAQs
- → How can I achieve smooth pastel royal icing?
Combine powdered sugar and meringue powder, adding water gradually until the icing is smooth and thick yet spreadable. Tint with pastel gel colors and mix thoroughly for even hues.
- → What is the best way to prevent cookies from spreading too much?
Chill the dough discs for at least an hour before rolling and cutting shapes. This helps maintain the flower outlines during baking.
- → Can I add extra flavor to the dough?
Yes, adding a drop of almond extract enhances the flavor subtly without overpowering the buttery base.
- → What is the recommended baking temperature and time?
Bake at 350°F (175°C) for 10–12 minutes until edges are just turning golden, then cool on the baking sheet for 5 minutes before transferring to a rack.
- → Are there options for dairy-free variations?
Substitute the unsalted butter with a plant-based alternative to make these cookies suitable for dairy-free diets.
- → How can I achieve detailed flower decorations with icing?
Use piping bags fitted with small round tips to carefully pipe the royal icing for refined flower petal details.