 Save
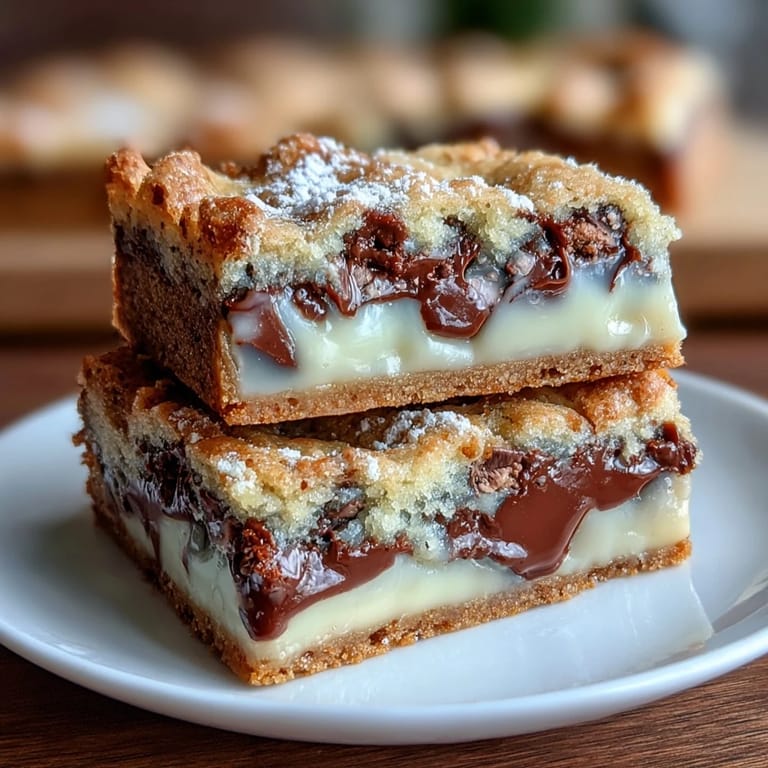
Save I stumbled upon clotted cream in a tin at a specialty shop and bought it on impulse, thinking vaguely of scones. But standing in my kitchen the next afternoon with this cloud-like cream in my hand, I realized it belonged somewhere richer, somewhere unexpected. These cookie bars happened almost by accident—what if I treated clotted cream not as a topping but as the foundation of something warm and buttery? The result is a bar that tastes like someone whispered luxury into ordinary cookie dough.
My sister came over on a gray November afternoon, and I'd just pulled these from the oven. The kitchen smelled like toasted butter and vanilla, and she took one bite and closed her eyes. She didn't say anything for a moment, and then she just shook her head and asked me to make them again before she left. That's the moment I knew this recipe had staying power.
Ingredients
- Unsalted butter (120g): Room temperature is non-negotiable here; it creams into the clotted cream in a way cold butter simply won't, creating that signature tender crumb.
- Clotted cream (120g): This is your secret weapon—it adds richness and a subtle tang that elevates these beyond standard blondies, so don't skip it or substitute without understanding you're changing the personality of the whole bar.
- Light brown sugar (150g): The molasses notes ground the sweetness and keep these from tasting one-dimensional.
- Granulated sugar (50g): This balances the brown sugar and helps create that slightly crispy edge you want.
- Egg (1 large, room temperature): Room temperature means it blends smoothly and helps your dough come together more evenly.
- Vanilla extract (2 tsp): Use pure vanilla; it makes a noticeable difference in how the flavors dance together.
- Fine sea salt (1/2 tsp): This isn't just seasoning—it heightens the clotted cream's flavor and keeps everything from feeling one-note.
- All-purpose flour (250g): Weigh it if you can; scooping compacts flour and can lead to a denser, tougher bar.
- Baking powder (1/2 tsp): Just enough lift to keep these tender, not cakey.
- White chocolate chips or chunks (150g): Chop your own from a bar if you can—they melt more luxuriously than chips, though chips work perfectly well too.
Tired of Takeout? 🥡
Get 10 meals you can make faster than delivery arrives. Seriously.
One email. No spam. Unsubscribe anytime.
Instructions
- Get your oven ready and prep your pan:
- Heat to 175°C (350°F) and line your 22x22 cm pan with parchment, letting it overhang slightly so you can lift the whole thing out once cooled. This step takes thirty seconds but saves you from wrestling warm bars out of the pan.
- Cream the butter and clotted cream together:
- Beat them with both sugars for 2 to 3 minutes until the mixture is pale and fluffy—you're incorporating air here, which is what keeps these bars tender rather than dense. Listen for the mixer to lighten its sound; that's your signal you're done.
- Add the egg, vanilla, and salt:
- Mix until you can't see streaks of egg anymore, about 1 minute. The dough should look glossy and slightly emulsified at this point.
- Bring the dry ingredients together:
- Sift the flour and baking powder into a separate bowl first (it's worth the extra dish, I promise), then add it gradually to the wet mixture and stir just until combined. Overmixing at this stage invites toughness, so stop as soon as you see no white flour streaks.
- Fold in the white chocolate:
- Use a spatula and a gentle hand, turning the dough over itself until the chocolate is distributed. If some pieces don't look perfectly folded in, that's fine—they'll soften in the oven anyway.
- Spread and smooth into the pan:
- Pour the dough in and use your spatula to even it out. You want a relatively uniform thickness so everything bakes at the same pace.
- Bake until golden at the edges:
- This takes 23 to 26 minutes, depending on your oven's mood. You'll know it's ready when the perimeter is golden brown but the center still looks slightly underdone—it firms up as it cools. A toothpick should pull out with a few moist crumbs clinging to it.
- Cool completely in the pan before cutting:
- This is patience work, but essential. The bars set as they cool, making them easier to cut cleanly. Once cooled, use the parchment overhang to lift the whole slab out, then cut into 16 bars.
 Save
Save I learned that comfort food doesn't always mean nostalgia. Sometimes it's about discovering something new that feels instantly familiar, something that makes you want to bake it again before the first batch is gone. These bars do that—they feel like a secret you can't wait to share.
The Magic of Clotted Cream in Baking
Most people think of clotted cream as something for tea time, dolloped onto scones with jam. But it's a quietly powerful baking ingredient that adds a richness and subtle tang you can't replicate with butter or sour cream alone. The fat structure is different—it's almost whipped, which means it incorporates air differently and creates a tender, almost velvet-like crumb. I've used it in shortbread, in pound cake, and in cookies, and every time it lifts the flavor profile somewhere unexpected. It's one of those ingredients that makes people pause mid-bite and ask what you did differently.
Why White Chocolate Works Here
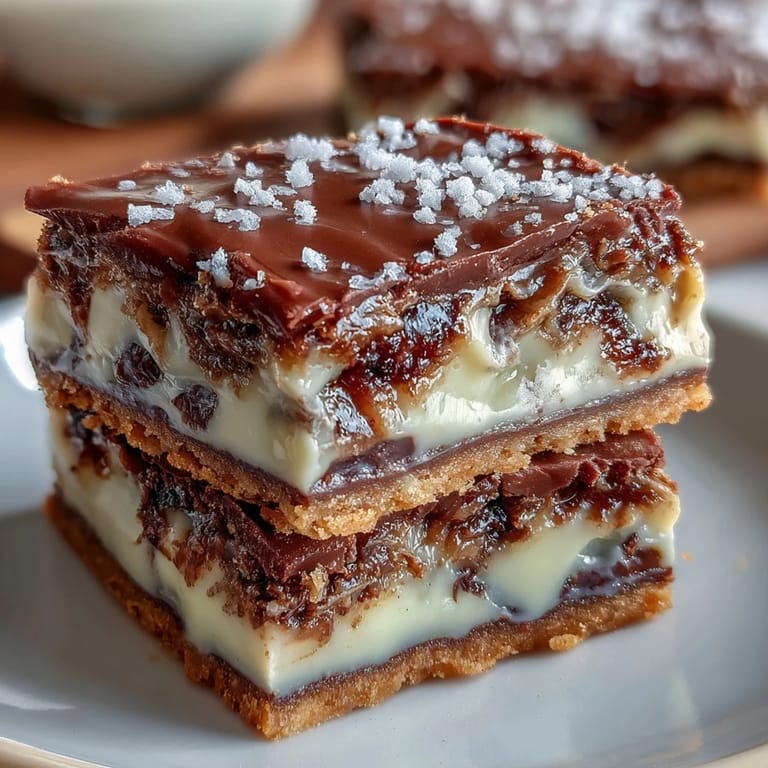
White chocolate gets a bad reputation sometimes, but when it's good, it's genuinely good—and it's the only chocolate that lets the clotted cream's tangy sweetness shine without competing for attention. Milk or dark chocolate would pull the bar in a different direction entirely, which is fine if that's what you want, but white chocolate feels intentional here, luxurious even. It softens in the oven just enough to create pockets of creaminess without disappearing completely. If you do want to swap it out, milk chocolate keeps things approachable and familiar, while dark chocolate transforms these into something more sophisticated and slightly bitter-edged.
Storage and Serving
These bars keep beautifully in an airtight container at room temperature for up to four days, though in my house they rarely make it past two. They're equally good straight from the counter or slightly warmed, and they pair wonderfully with coffee or tea. If you want to fancy them up, a drizzle of melted white chocolate across the top once they're cool adds visual appeal and an extra hit of sweetness—not essential, but it transforms them into something you'd serve at a gathering.
- Cut the bars while they're completely cool for cleaner edges and less crumbling.
- If they seem dry after a day or two, press them into an airtight container with a slice of bread to add back moisture.
- These freeze well too—wrap them individually in plastic wrap and they'll keep for up to a month, ready for unexpected guests.
 Save
Save These bars are the kind of recipe that reminds you why you love baking in the first place—the way simple ingredients can come together to create something that feels special without being difficult. Make them once, and you'll find yourself making them again.
Recipe FAQs
- → What makes clotted cream special in these bars?
Clotted cream adds a rich, velvety texture and distinct buttery flavor, elevating the overall indulgence of the bars.
- → Can I substitute the white chocolate?
Yes, milk or dark chocolate can be used instead, altering the sweetness and depth to your preference.
- → How do I know when the bars are done baking?
Bake until edges turn golden and a toothpick inserted into the center comes out with a few moist crumbs attached.
- → What is the best way to store the bars?
Keep them in an airtight container at room temperature to maintain freshness for up to four days.
- → Any tips to enhance the flavor after baking?
Drizzling melted white chocolate over cooled bars adds a rich, decorative touch and extra sweetness.