 Save
Save My neighbor mentioned in passing that she'd never hosted a proper housewarming, and something about that comment stuck with me. I spent an afternoon thinking about what would make someone feel truly welcomed into a new space, and I realized it wasn't about impressing anyone—it was about creating a moment where people could relax and enjoy something thoughtful. That's when I landed on this dessert bar: three completely different treats that somehow felt like they belonged together, each one simple enough to make ahead but fancy enough to feel special.
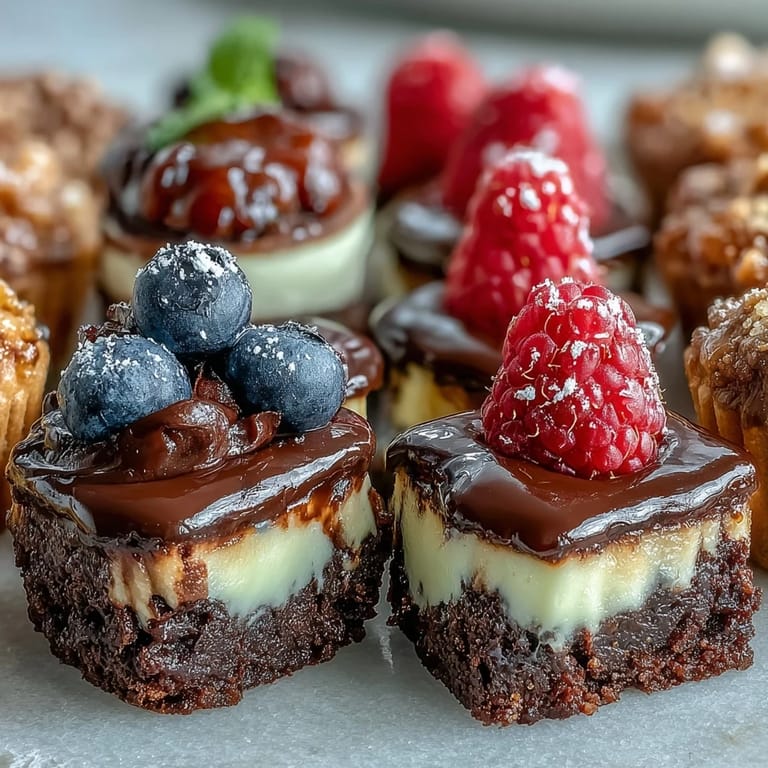
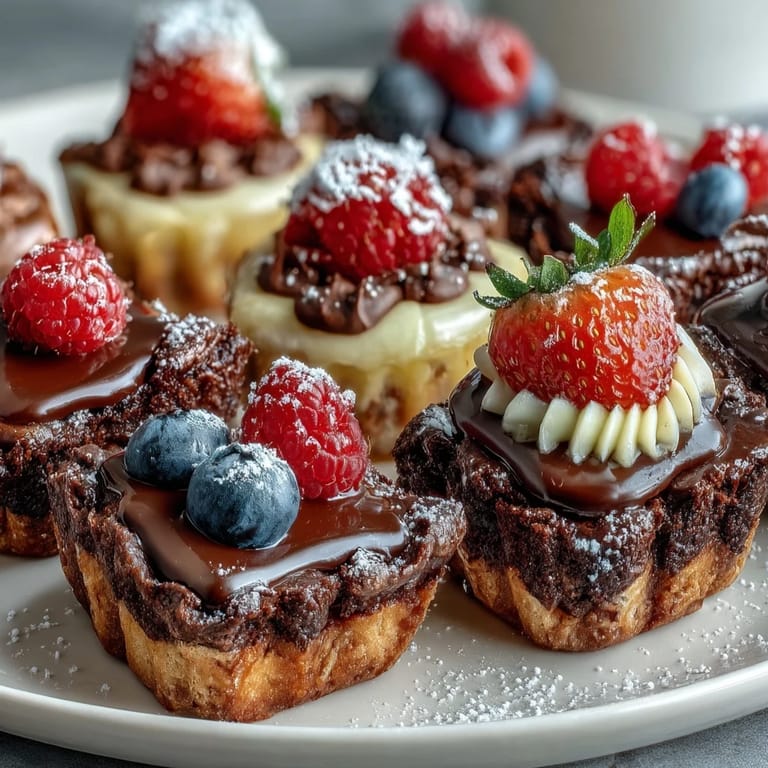
The first time I actually assembled one of these bars was for my sister's open house, and I remember standing in her kitchen two hours before people arrived, arranging tiny treats on a vintage cake stand I'd borrowed from my mom. My sister kept saying "this seems like too much," but when guests started arriving and their eyes landed on that tower of brownies, cheesecakes, and tartlets, something shifted in the room. Suddenly everyone was lingering in the kitchen, reaching for seconds, and asking for recipes.
Ingredients
- Dark chocolate, chopped: Buy a good-quality chocolate you'd actually eat on its own—it makes the brownies taste less generic and more like something you genuinely wanted to make.
- Cream cheese, softened: Take it out of the fridge at least thirty minutes before mixing; cold cream cheese never blends smoothly and you'll end up with lumpy cheesecake filling.
- Lemon zest: Zest the lemon before you cut it in half for juice, and use a microplane if you have one—it makes a real difference in brightness.
- Fresh berries: Buy them the day before or the morning of assembly; they're most beautiful when they haven't sat around losing their shine.
- Digestive biscuits or graham crackers: Pulse them in a food processor if you have one, but honestly, a sealed plastic bag and a rolling pin works just as well and is oddly therapeutic.
- Shortcrust pastry, ready-rolled: This is where you save yourself an hour of rolling and chilling; it's not cheating, it's smart.
Tired of Takeout? 🥡
Get 10 meals you can make faster than delivery arrives. Seriously.
One email. No spam. Unsubscribe anytime.
Instructions
- Get everything ready:
- Preheat your oven to 180°C and prepare your mini tins—line the muffin cups with paper if you want easy removal later, or just grease them well. This is the moment where the kitchen should feel organized and ready, not chaotic.
- Make the brownie batter:
- Melt your butter and chocolate together slowly so nothing seizes up, then whisk in the sugar and eggs until you have something glossy and thick. Fold in the flour gently—you want fudgy brownies, not tough ones, so stop mixing the second you don't see white streaks anymore.
- Bake the brownies:
- Spoon the batter into eight mini cups and slide them into the oven for 12–15 minutes; they should look set on top but still soft when you jiggle the tin. They'll keep cooking slightly as they cool, which is exactly what you want for that perfect texture.
- Build the cheesecake crusts:
- Mix your crushed biscuits with melted butter until it looks like wet sand, then press it firmly into the bottom of eight cups. The butter helps it hold together, so don't skip this step or your crust will crumble when people try to eat it.
- Make the lemon filling:
- Beat the softened cream cheese until it's completely smooth and fluffy, then add everything else and mix just until combined. Overmixing introduces air bubbles that can cause cracks, so be gentle here.
- Bake the cheesecakes:
- Bake for 12–15 minutes until the filling is just barely set—it should still jiggle ever so slightly in the center. Overbaking leads to dense, cracked cheesecake, so trust the jiggle test and pull them out when they look barely done.
- Prepare the tartlet shells:
- Cut your shortcrust pastry into circles, press them into tartlet tins, prick the bottoms with a fork, and bake until they're golden and crisp. This prevents soggy pastry, which is honestly one of life's small tragedies.
- Make the custard filling:
- Whisk milk, egg yolk, sugar, cornstarch, and vanilla in a saucepan and heat gently, stirring constantly, until it thickens and coats the back of a spoon. The cornstarch prevents it from tasting eggy and gives it a silky texture that feels fancy.
- Assemble the tartlets:
- Once the custard has cooled slightly, spoon it into the baked shells and top each one with fresh berries. This can be done up to a few hours ahead, so it's a nice make-ahead element.
- Create your dessert bar:
- Arrange all three treats on your serving stand or platter in an alternating pattern so the colors pop. A few fresh mint leaves scattered around make everything look like you're a pastry chef, even though you're not.
 Save
Save What I didn't expect was how this dessert bar became the thing people kept talking about weeks later. My neighbor came by for coffee a month after her housewarming and mentioned that guests had texted her asking for the recipes, and that one friend had attempted the brownies and discovered they actually could bake something impressive. It wasn't really about the treats themselves—it was about creating a moment where homemade felt achievable and special.
The Magic of Timing
One thing I learned from making this repeatedly is that timing is actually your friend here, not your enemy. The brownies and cheesecakes bake simultaneously at the same temperature, so you can pop them both in while the tartlet shells are cooling. By the time you're making the custard filling, the cheesecakes are done and cooling, and everything finishes in a surprisingly organized way. Planning this out on paper the night before takes five minutes and saves you from the 3 p.m. panic.
Customizing for Your Crowd
The beauty of a dessert bar is that it's endlessly adaptable without feeling sloppy or half-hearted. In summer, I use whatever berries look best at the farmers market; in winter, I've drizzled the tartlets with melted dark chocolate instead and it felt completely intentional. The brownie recipe is forgiving enough for cocoa powder substitutions if someone mentions a chocolate allergy, and you could easily swap the lemon filling for a vanilla or chocolate version if citrus isn't your thing.
Setting Up Like a Pro
The presentation is half the battle, and I mean that genuinely. A simple tiered stand transforms three separate batches of mini desserts into something that looks like you spent a day planning. If you don't have a fancy stand, a cutting board angled slightly with stacked cookbooks underneath works surprisingly well, or honestly, just arrange them on your nicest platter in groups of three so they look intentional. Dust everything lightly with powdered sugar if you're feeling fancy, or just leave them bare and let the colors speak for themselves.
- Arrange the treats in an alternating pattern so each type is visible from multiple angles.
- Add fresh mint or a light dusting of powdered sugar only right before guests arrive so everything looks fresh and dewy.
- Keep extras refrigerated and pull them out as needed throughout the evening so the bar always looks full and abundant.
 Save
Save This dessert bar has become my go-to for any celebration that feels like it needs something special but doesn't quite warrant a full cake. It's the kind of thing that makes people feel welcomed without making you feel like you've been cooking all day.
Recipe FAQs
- → How do I ensure the brownie bites stay fudgy?
Bake the brownie batter just until set, about 12–15 minutes, avoiding overbaking to retain moistness.
- → Can I prepare the cheesecake cups ahead of time?
Yes, refrigerate cheesecake cups after baking to let them set fully and enhance flavor.
- → What pastry works best for the fruit tartlets?
Ready-rolled shortcrust pastry is ideal for a crisp, buttery tart shell.
- → How do I prevent soggy tartlet bases?
Bake the shells until golden and cool before adding filling to maintain crispness.
- → Can I customize toppings for these mini treats?
Absolutely, seasonal fruits, drizzles of chocolate, or whipped cream add wonderful variations.