 Save
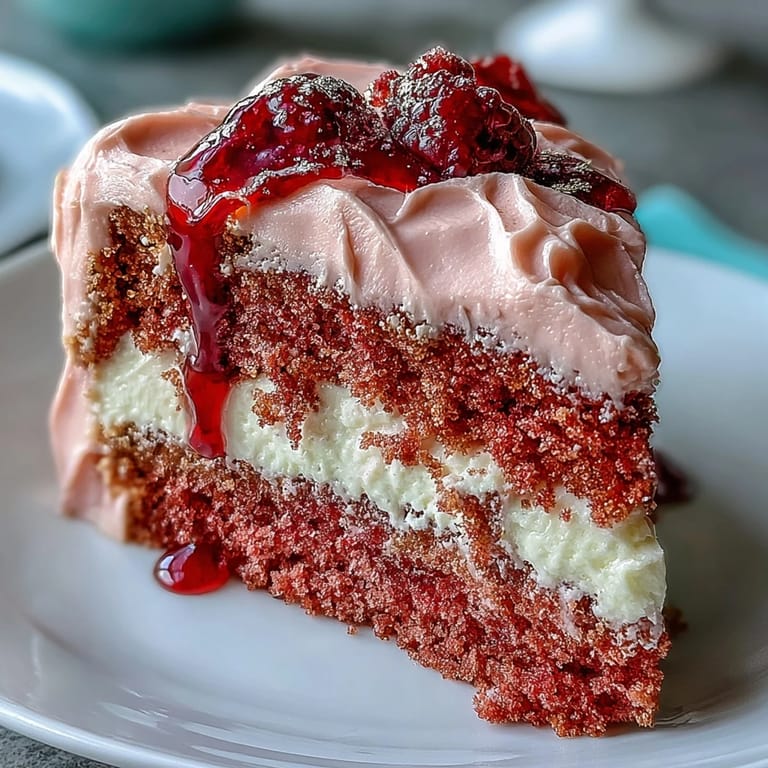
Save The first time I baked this Rosé Velvet Cake, the entire kitchen was tinged with the gentle aroma of wine and vanilla. There was a low hum from the stand mixer and a scatter of pink streaks across my apron, evidence of my guesswork with the food coloring gel. What fascinated me most wasn’t just the cake’s blush hue, but the way the rosé delivered an understated tartness beneath all that butter and sugar. As the layers cooled, I kept sneaking tastes of the frosting—deciding exactly when it turned from "just sweet" to truly decadent. It felt like preparing a centerpiece worthy of a celebration long before any guests arrived.
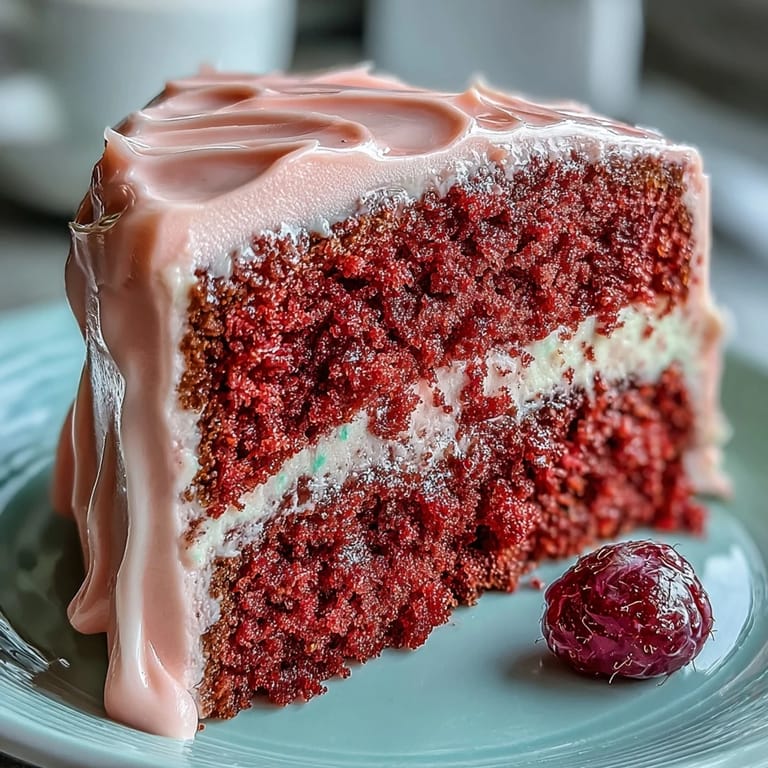
A few months ago, I made this cake as a surprise for my sister’s bridal shower. Between the laughter and the clatter of cake stands, someone jokingly asked if the gold drip was real gold, and I still remember dabbing luster dust on with trembling excitement as a small circle gathered to watch. When I sliced through the golden crown and revealed the pastel pink interior, every guest gasped as if it really were a treasure inside. In that moment, it wasn’t just a dessert—it became the centerpiece of the afternoon’s memories.
Ingredients
- All-purpose flour: Sift well to avoid lumps and ensure a tender crumb—too much can make the layers dense.
- Granulated sugar: Cream it thoroughly with butter for a fluffy, pale base; never rush this stage.
- Baking soda and baking powder: Don’t substitute one for the other—each lends unique lift for that signature velvet texture.
- Salt: Even a small pinch brings balance and depth to the cake’s sweetness.
- Unsweetened cocoa powder: Just enough for earthy undertones without overpowering the pink color—always sift out any clumps.
- Unsalted butter: Should be truly softened but not melted, for velvety batter and extra-creamy frosting.
- Buttermilk: Let it come to room temp, or the batter may split; brings subtle tang and keeps layers moist.
- Rosé wine: Use one you enjoy drinking; a dry style adds elegance without overwhelming the palate.
- Large eggs: Room temperature eggs blend in smoothly and help the cake rise evenly.
- Vanilla extract: Use pure extract if you can, a little detail that enhances the cake’s floral notes.
- White vinegar: Reacts with soda for that fine-crumbed, classic velvet texture; don’t skip it.
- Pink food coloring gel: Start small—one drop at a time—until you get a subtle, romantic blush.
- Cream cheese: The backbone of classic frosting, but make sure it’s very soft for easy blending.
- Powdered sugar: Sift it before adding—this saves your arm (and sanity) from extra beating.
- Heavy cream: For the drip, use cold cream with chocolate chips for a smooth, shiny finish.
- White chocolate chips: Melt slowly for drip perfection, stirring between microwave bursts.
- Edible gold luster dust & vodka: Mix just before brushing; it glides on best with a soft, food-safe brush.
Tired of Takeout? 🥡
Get 10 meals you can make faster than delivery arrives. Seriously.
One email. No spam. Unsubscribe anytime.
Instructions
- Set the scene:
- Preheat your oven to 350°F (175°C), and line three 8-inch cake pans with parchment. The sizzle of butter as you grease the pans is always oddly satisfying.
- Mix with precision:
- Sift flour, cocoa, baking soda, baking powder, and salt into a bowl, feeling the grains fall like soft sand between your fingers.
- Cream for lightness:
- In a large bowl, beat butter and sugar for about 3 minutes until the mixture turns pale and fluffy and the sugar is no longer gritty to the touch.
- Egg and essence:
- Beat in eggs one at a time, scraping the bowl, then drizzle in vanilla, releasing a rush of fragrance.
- Rosé-kissed blending:
- Add buttermilk, rosé, and vinegar, mixing gently; the batter may look a bit marbled at first, but it will come together.
- Blush of color:
- Stir in the sifted dry ingredients gradually, then fold in pink food coloring until the color just hints at spring roses.
- Bake and anticipate:
- Divide the batter, smoothing the surface for even layers, and bake for 30-35 minutes—your kitchen will smell like a patisserie with a twist.
- Cool the patience:
- Let the cakes rest in pans for 10 minutes before turning onto racks to cool completely; don’t rush or the layers may break.
- Whip up the frosting:
- Beat butter and cream cheese until smooth, then gradually add powdered sugar, rosé, vanilla, and a pinch of salt; taste for just the right level of tang and sweetness.
- Assemble with care:
- Level the layers, then alternate cake and frosting. Chill with a crumb coat, then frost again for a perfectly smooth finish.
- Gilded drip magic:
- Melt white chocolate chips and cream in bursts, cooling to room temp, then drip gently over the cake edges for dramatic effect.
- Spin the gold:
- Mix edible gold luster dust with a splash of vodka and swipe carefully over the set drips for shimmering highlights.
- Final flourish:
- Chill at least 30 minutes before slicing—admire your gold-trimmed creation before you let anyone near it with a knife.
 Save
Save  Save
Save When my friend bit into her slice at the shower and shut her eyes in pure delight, it was the sort of kitchen victory you just want to bottle. No matter how grand the gold looked, it was the hint of rosé in every bite that kept guests going back for seconds.
How to Nail the Gold Drip
Mastering the gold drip is all about timing and confidence. You want the chocolate to be just cool enough to hug the cake edges in slow-motion drips, but not so firm that it clumps. During my first attempt, I hesitated and overmixed—leading to a thick mess that looked more like puddles than rivers of gold. Now, I aim for a ribbon-like consistency, practicing on parchment paper before braving the cake itself. That little practice run saves a lot of headaches.
Decorating for Drama
Every time I finish smoothing on the final layer of frosting, I let my creativity take over—sometimes it’s a handful of edible flowers, other days it’s a sprinkle of berries or a gilded flourish. The cake pairs beautifully with soft whites and pastels on the table so don’t be afraid to go all out for your event. If you’re feeling extra celebratory, a few extra specks of edible glitter never hurt. I find guests love the anticipation of what’s hidden underneath an opulent exterior. The more you play with the look the more memorable it becomes.
What I’ve Learned After Baking This Cake Countless Times
What really makes this cake special is how forgiving it is—even when my layers leaned or my first drip misbehaved, a dusting of gold always rescued the look. Over time, I realized that brushing syrupy rosé between layers takes both flavor and moisture to the next level. Mistakes are easy to mask, and each new bake feels like a personal best rather than a rigid repeat.
- Test the drip consistency on a plate before you commit to your cake.
- Let the crumb coat set thoroughly in the fridge, especially if your kitchen is warm.
- If you run out of luster dust, a little gold leaf scattered on top is just as impressive.
 Save
Save  Save
Save Slicing into this cake feels like unwrapping a present every time. I hope your celebrations are filled with laughter and a little bit of edible sparkle.
Recipe FAQs
- → How do I get a smooth, stable gold drip?
Warm white chocolate with cream in short bursts until glossy, cool to room temperature so it thickens slightly, then apply slowly with a spoon or squeeze bottle. Chill briefly to set, then paint the chilled drip with gold luster mixed with vodka or clear extract for a clean metallic finish.
- → Can this be made without alcohol?
Yes. Substitute rosé with sparkling grape juice in the batter and frosting. Brush layers with reserved grape juice for added moisture and flavor while keeping the same celebratory profile.
- → How do I keep the cream-cheese frosting from softening?
Work with well-chilled butter and cream cheese, whip until smooth but not warm, apply a thin crumb coat and chill the cake for at least 30 minutes before the final coat. Keep the finished cake refrigerated until serving in warm conditions.
- → What’s the best way to achieve an even blush-pink color?
Use concentrated gel food coloring and add it a little at a time, folding gently to avoid overmixing. Test color on a small spoonful of batter and remember it will mellow slightly during baking and frosting.
- → How should I transport a layered cake safely?
Chill the cake until firm, place it on a non-slip mat inside a snug cake box, and carry on a flat surface in the vehicle. Keep it cool and avoid sudden stops or sharp turns to preserve the drip and decorations.
- → Can I bake this in different pan sizes?
Yes. Adjust bake time for deeper or shallower pans and check doneness with a toothpick. If using fewer pans, level layers after cooling to maintain even stacking and consistent layer thickness.